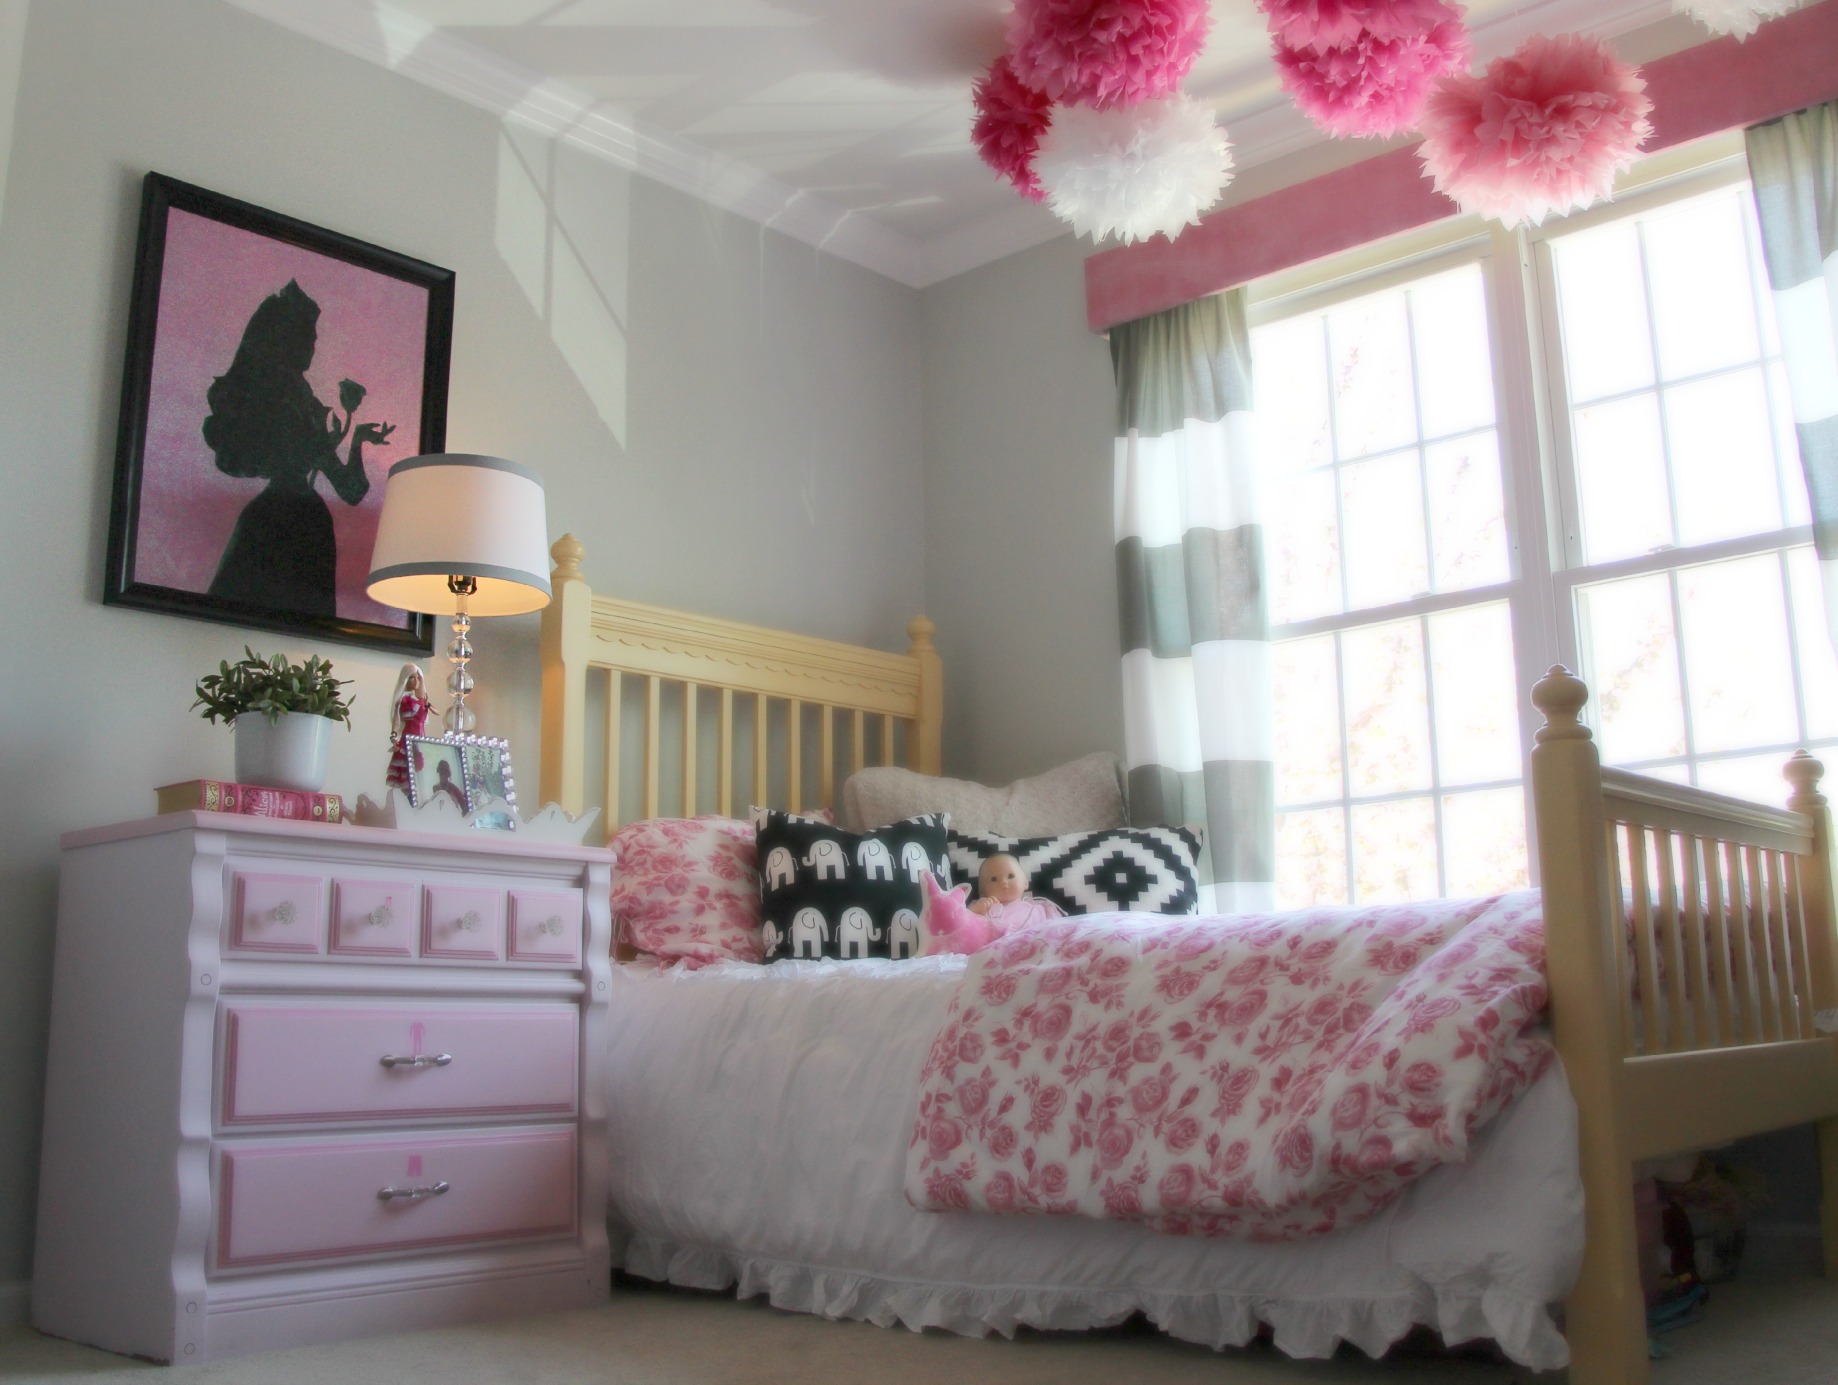
I could not be happier with the way this project came out! It certainly morphed quite a bit on it’s way from some fuzzy place in my brain to hanging on Sam’s wall but nonetheless I’m so darn excited with the final product! I knew I wanted something that was an image of Sleeping Beauty & was made completely of glitter. Originally, I was hung up on the idea of a full color Sleeping Beauty image but 1- I was having a heck of a time finding flesh colored glitter & 2- I couldn’t quite figure out how to color the different sections of the image without having one glitter color bleed into the next area’s glitter color. This piece is really the backbone of justifying the finished room as a ‘princess room’ to my Disney obsessed 4 year old so I just couldn’t let the idea go. This last trip to Florida however, I was talking it through with my Mom & she suggested I do a silhouette of a princess. DING! DING! DING! Thank you Nana!
For this project you’ll need:
- Framed picture, whatever the image is that’s currently in the frame needs to be on a sturdy piece of cardboard or canvas as this is what you’ll be creating your artwork on.
- Princess Silhouette (I googled ‘Sleeping Beauty Silhouette’)
- Glitter!! Black for the silhouette & the background color of your choice. (Ex: Blue for Cinderella, Gold for Belle or Purple for Rapunzel) I used 3 bottles of Martha Stewart Bubblegum Pink Irridescent Glitter for the background & 1 bottle of Onyx for the silhouette.
- Mod Podge
- Clear Sealant (I used this one by Delta but if I do this project again I might try a spray version.
- Overhead projector (I got super lucky that my neighbor had one I could borrow, ask your friends who are teachers or try to rent one from your local library if you can’t find one. Ask around though, you’d be surprised how many people actually have one of these!)
- Foam brushes
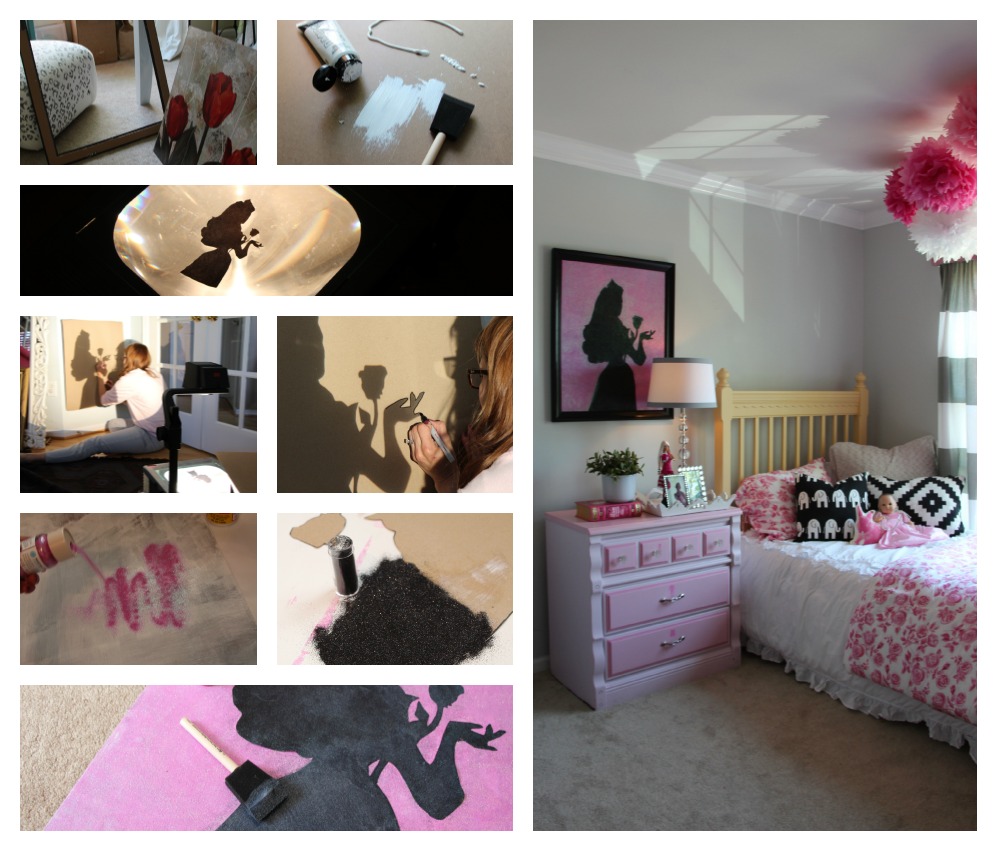
1) Take the picture out of the frame. Mine was a cheap-o printout of tulips & it easily ripped off of the cardboard insert. If you’re going to paint the frame now is the time to do it, I’ve found that spray paint works really, either a color one or the gold or silver metallic spray paints would be great! 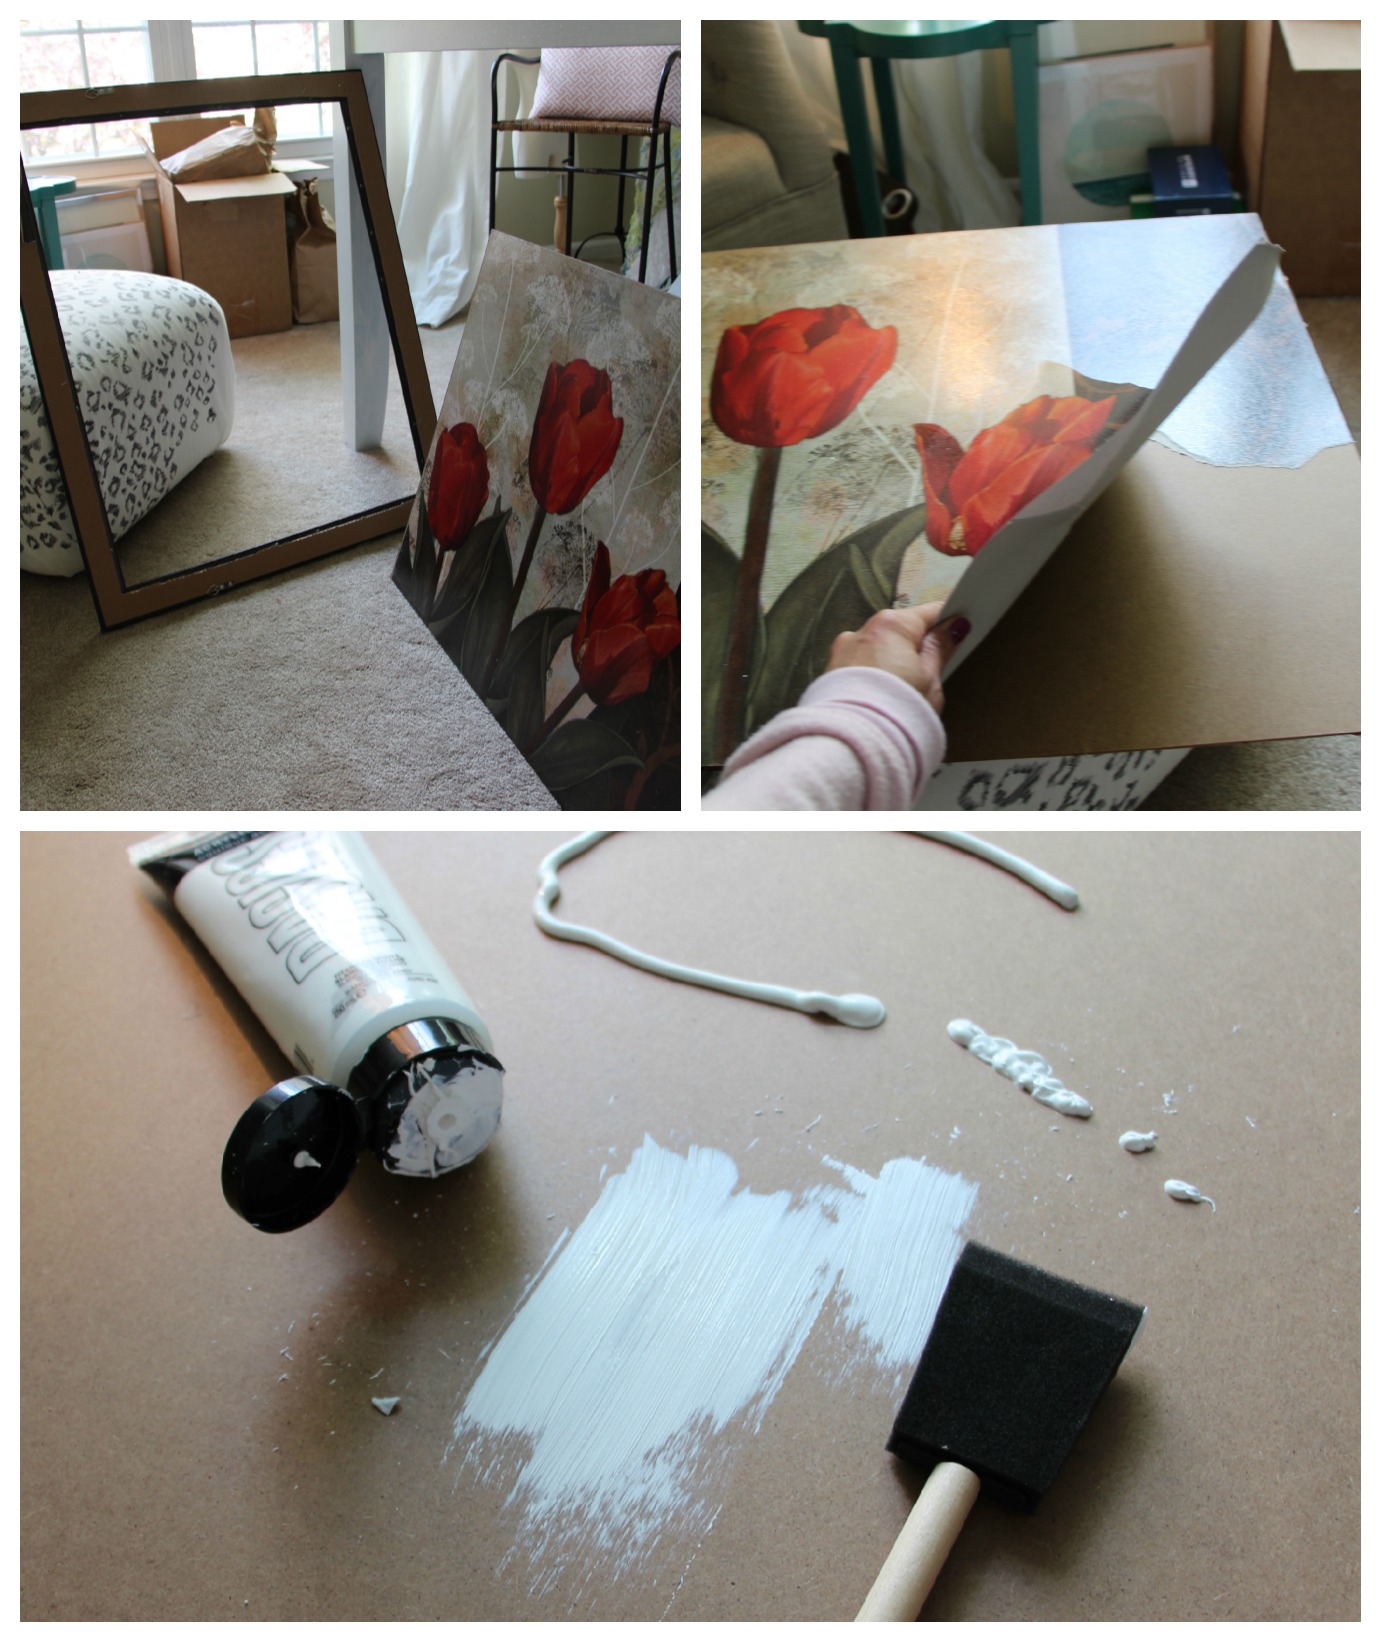 2) Paint your background the same color as your background glitter. I painted mine white & as I was glittering the pink I thought to myself, DUH, this would’ve been a lot easier to get great coverage if my background matched my glitter.
3) While that dries get busy on the silhouette. The first step is to print out your image & then carefully cut it out. I found it was easiest to use a pair of super sharp small scissors. Pay close attention to details like the fingertips, these are what really make the princess silhouette recognizable.
4) Project your cutout onto a wall, tape a large piece of paper (a roll of craft paper or even wrapping paper would be great) onto the wall. Adjust the size of the projection by moving the projector closer or further away from the wall & then adjust the focus with the knob at the top.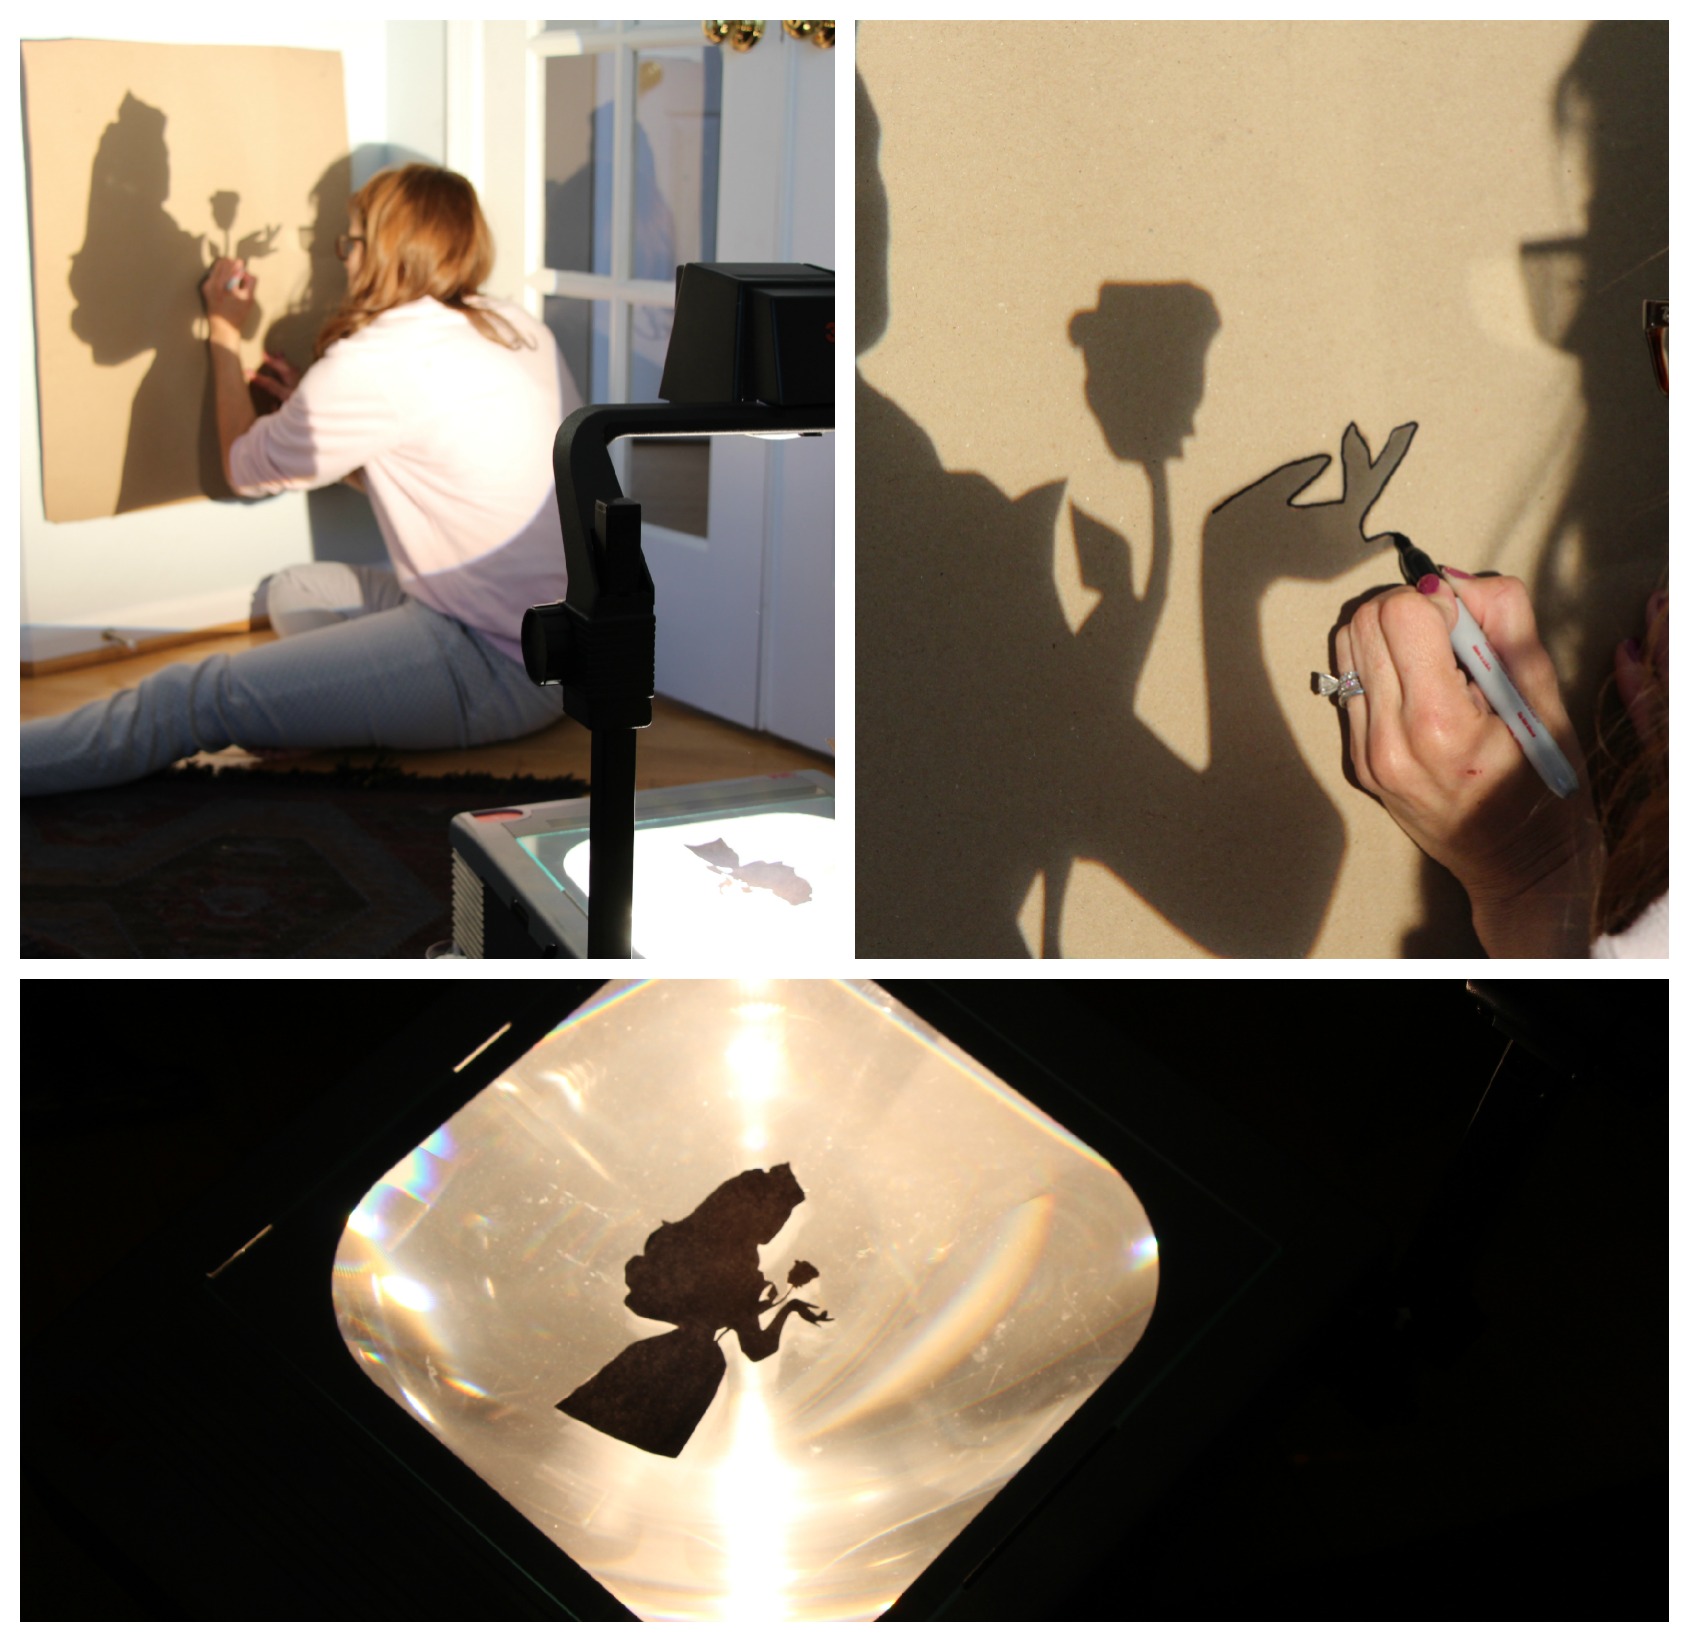
5) Carefully trace the image using a sharpie marker.
6) Cut out the silhouette.
7) Now it’s time to break out the glitter! You’ll want to work on a surface that can act as a catch all for the excess glitter & then be folded & funnel the glitter back into the bottle. Glitter is expensive, don’t waste it! Once again, wrapping paper or craft paper from a roll should work well. Start off with your background piece, working in small areas & using a foam brush apply a thin coat of mod podge & then sprinkle glitter liberally. Pick the piece up & tap off any excess, move onto the next section. After every few sections refill your glitter bottle with the excess glitter that’s accumulated on the catch-all paper. Once you’ve covered the entire background give it a few more taps & set it aside to dry. It’s ok if there are some sparse spots, we’re going to go back & fill those in later.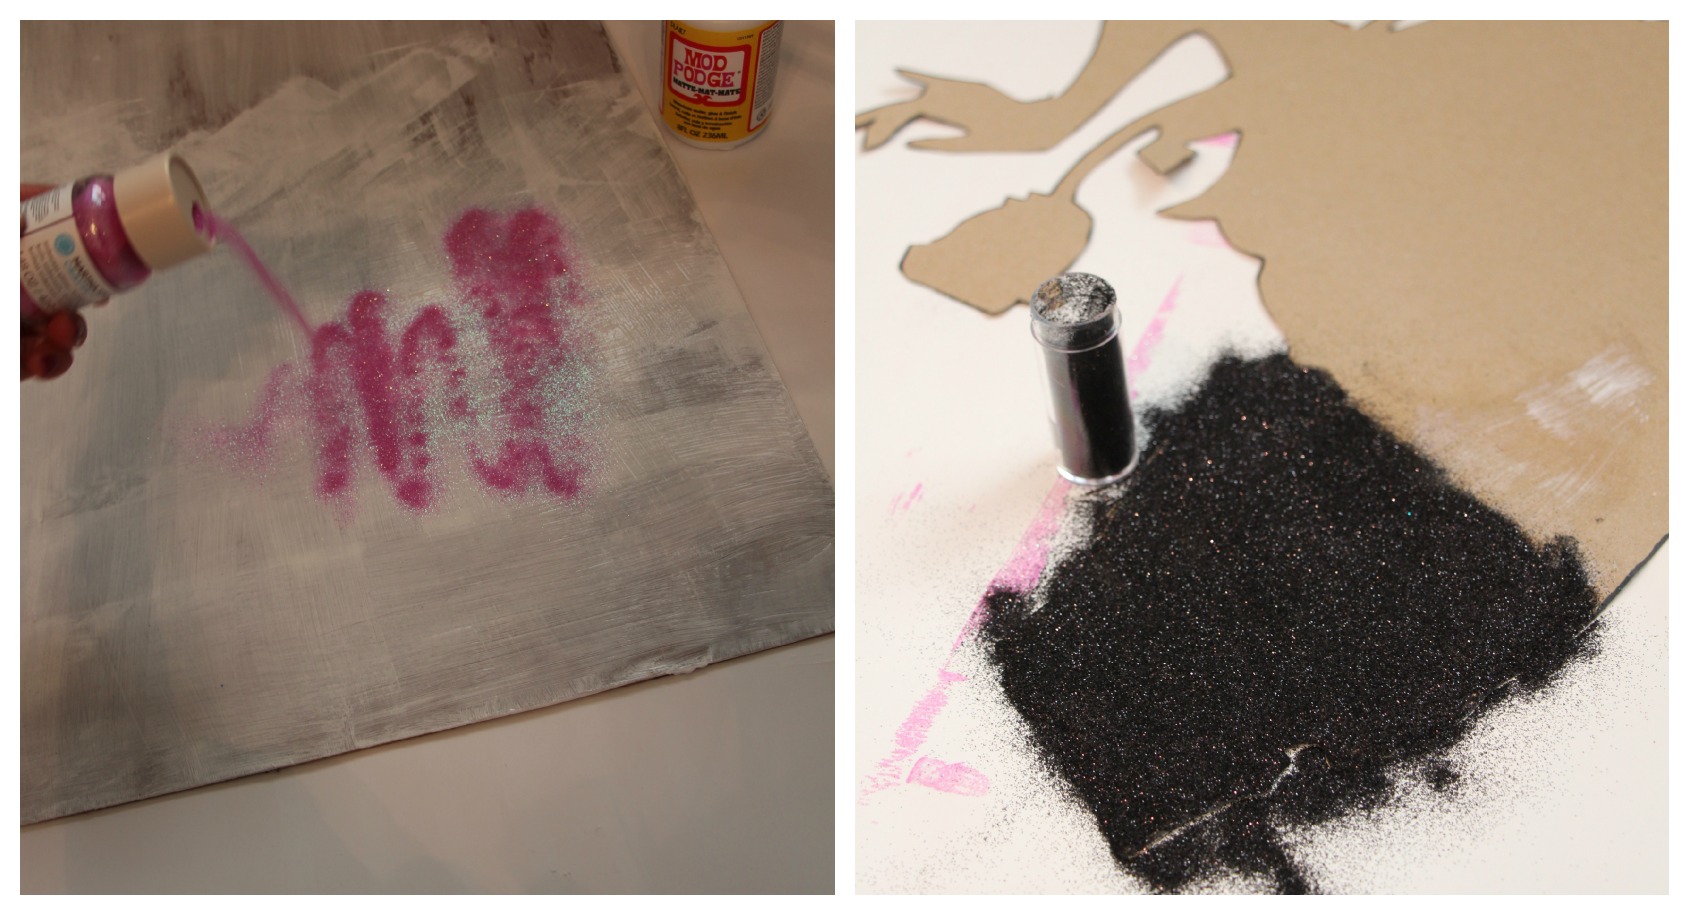
8) Using a different foam brush & different work surface paper (mixing glitter colors will majorly mess us your project!) repeat the glittering process with black glitter on your silhouette cutout. Set aside to dry.
9) Go back & re-glitter any sparse areas on the background piece & then on the silhouette piece. Shake both off well to remove excess glitter!
10) Using a new foam brush turn your silhouette piece over & give it a thin coat of mod podge, carefully press the glittered black silhouette onto the glittered background piece. Keep in mind when attaching this that if you get black glitter on your hands you won’t want to touch the pink background. Trust me, once you get black glitter onto the pink it sticks out like a sore thumb & is a pain to cover up! If that does happen to you however after the entire project is done you can go back & using a paintbrush & some more mod podge carefully cover the areas where the black spilled over with more pink glitter.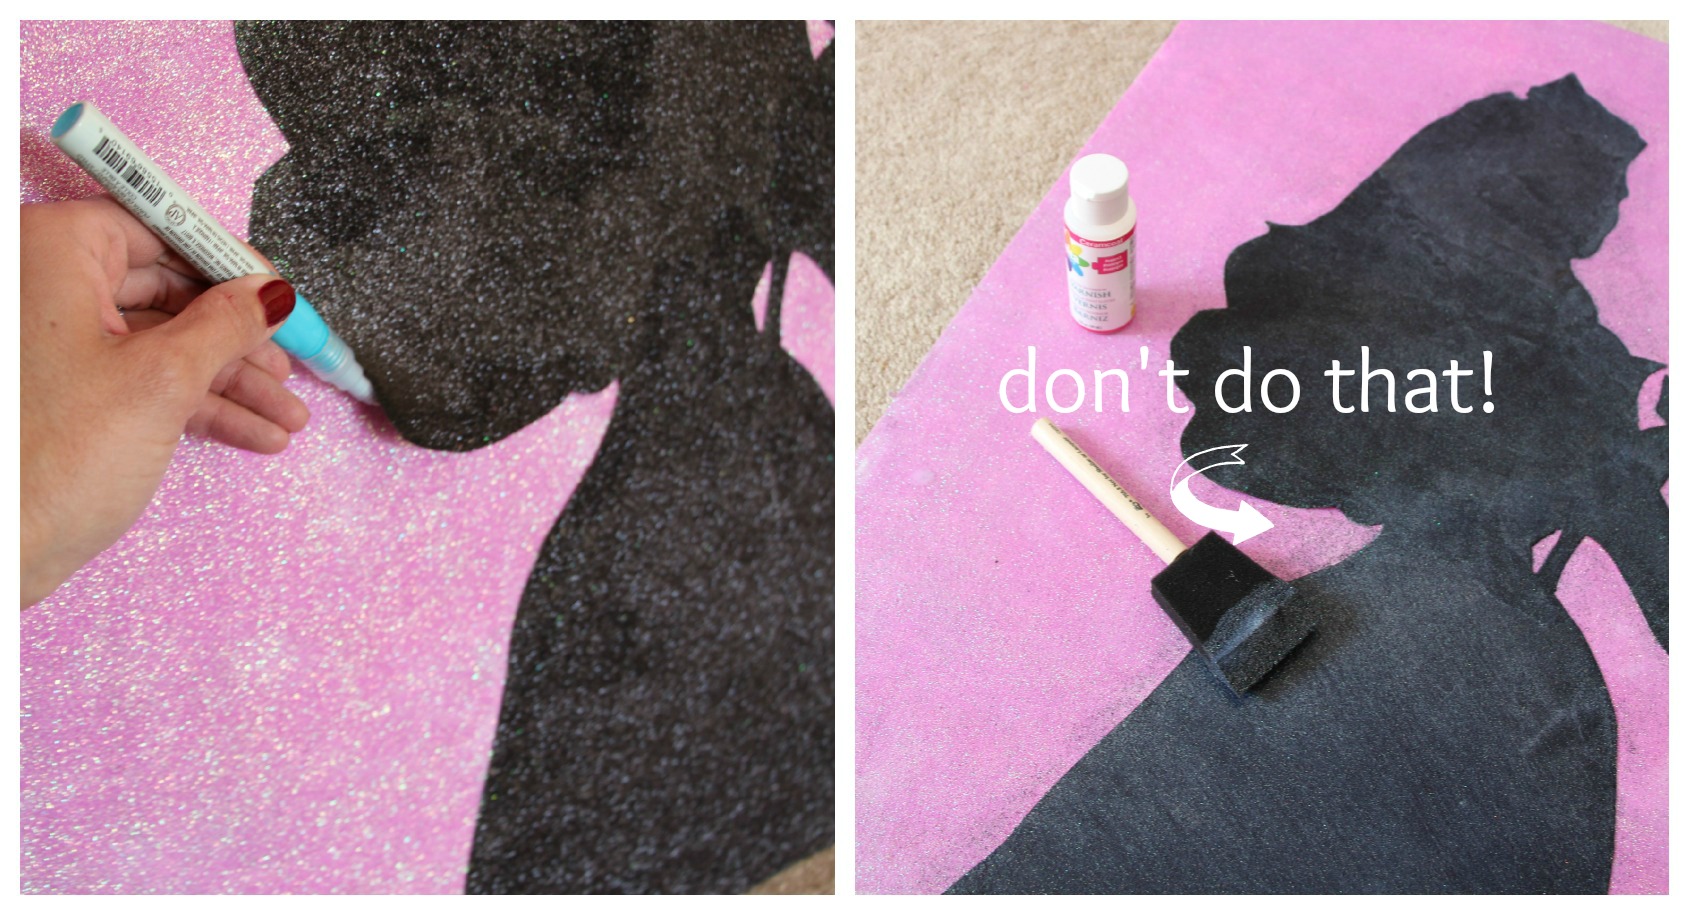
11) Allow to dry, if some edges are lifting up you can go back with a glue pen or more mod podge & a paintbrush to tack them down.
12) Seal it up! I chose to first seal the pink areas with my clear glaze & a new foam brush & then seal the silhouette areas with more glaze & a separate foam brush. I learned the hard way that if you flick your wrist when spreading the glaze onto the silhouette area you can get black glitter onto your beautiful pink background. It probably would’ve helped me avoid this problem if I had let the glazed pink area dry completely before glazing the black. That way if any black did get onto the pink the dried glaze would keep it from sticking & I could’ve brushed it off. In theory that is. I also toyed with the idea of using an aerosal sealant & carefully spraying the entire picture. I think if you stand far enough away from it than the force of the spray wouldn’t make the black glitter go everywhere. If you try that please let me know!
That’s it!! Place the finished artwork back in it’s frame & hang it up! Sit back & revel in your little girl’s giggles when she sees her new sparkling princess on her wall. (:
*Tip* If you can hang it on a wall that gets direct light, the glitter will really sparkle in the sun!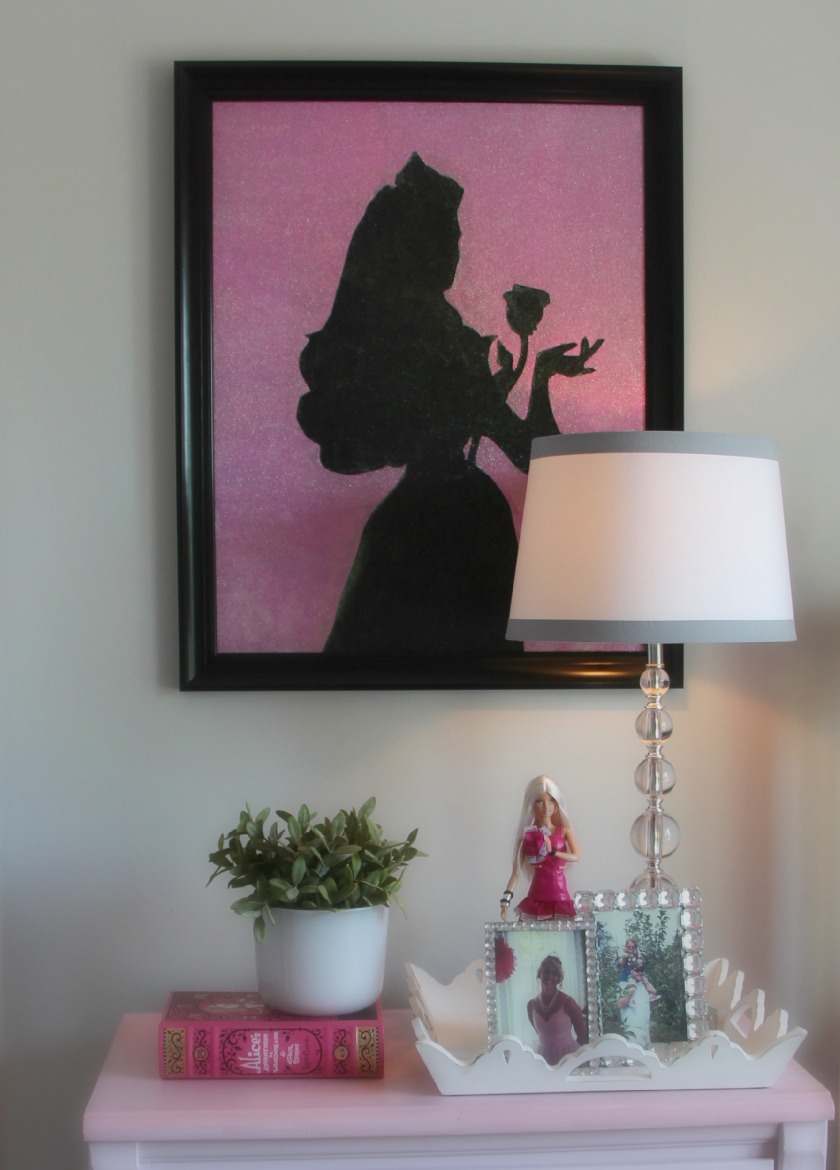


Love it! And go southpaws! 😉
I am amazed by your vision for things and determination to execute your vision. My process: I think of something that would look great, I go to the store, the store doesn’t have exactly what I want but they have something else that’s also fantastic so I’ll buy it, done. You go full out and realize your plan. It’s quite something! Disney should definitely make this, it’s a great idea.
Given your creativity and drive, you should seriously consider becoming an entrepreneur. You seem to easily find weak spots in consumer items, so keep an open mind that one of your ideas could just be extremely marketable and profitable. I’m serious, always be cognizant of your projects’ potential to improve or fill a market niche.
Ugh, have I told you lately how much I love you! Seriously though, you’re timing is a gift from God, there’s a business/project I’m working on and I might just have to tape your comment to my bathroom mirror to remind me!
haha I read “ugh” and thought, “oh no, how did I offend her?!” But nope, you love me! lol
You know, you should definitely take it as a sign. Everything that led up to that comment was a series of perfectly timed events (I decided to commute at the same time as my husband that day, we decided to share the paper, I got the section that featured an article about entrepreneurs, I saw your post and realized how much you embody the traits of an entrepreneur, I decided to take the time to write a message) and the fact that it coincided with your perfectly timed event really means something. God may just be nudging you here, listen up, don’t ignore the call. Get it done Natasha! I’m rooting for you. And even if this particular thing doesn’t end up being your pièce de résistance it could be a stepping stone to it. There’s something in it all that God is trying to get you to experience from it. Good luck.
i accidentally ordered a 16 x 20 canvas of a portrait of my daughter – it looks like something we’d use to memorialize her if something tragic happened. i was sad about it, but now i know it’s just waiting for a glitter transformation! i’m thinking maybe her initials…
LOL, way to make lemons out of lemonade!
Another amazing creation! Love it! And, thanks for your helpful posts on Houzz!
You. nailed. it. Being the mother of two girls myself I know what its like to feel like you are drowning in pink. And while I love Disney movies, their products are usually so tacky. But your vision is so subtle princess… Maybe you should design a line for them 🙂 Classy Disney.
Hmm classy Disney…interesting, lol