With all the wonderful t-shirt refashions out there I’ve noticed my scrap pile is getting bigger & bigger. I never can throw anything away. Here’s a way to use up some scraps & get a super cute flower pin for either you or your little girl. Pin it to a lapel, headband, anything! 

 (my model was sleeping although I must say I kind of liked wearing it!)
You’ll need: scrap fabric (I really think anything will work, even if it frays a bit that should just give it some texture. (I used a leftover fat quarter from this applique project) Scrap tulle, safety pin, small piece of felt & hot glue gun
This is a rough sketch as to what the petal cut-outs look like. They really can be far from perfect, they’ll be all smooshed up & tacked together so the cut out shapes are very forgiving. You’ll need 3 of the larger & 3 of the smaller.
 Once you get all your petals cut out you’ll want to scrunch them up to help them not lay flat.
 Now you’ll start the flower by making the bud out of the smaller petals. Take one petal, fold it in half & tack it down with a small dab of hot glue. Then fold it in half again & tack with hot glue.
 It should look something like this from the top view…
 Set the bud aside. Next cut out some tulle circles that are roughly the size of your large petals. You’ll need around 10 or so. Begin by layering a large petal, circle of tulle & another large petal. Use a small dab of hot glue in between the layers.
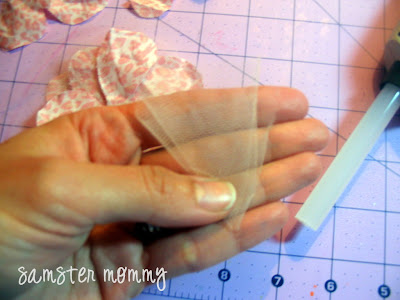
 The next layer of tulle is going to be folded to help give the flower some height. Fold one circle in half & then in half again. Glue down with the point at the center of the flower. Repeat with another tulle circle, this one will form the other half of the layer. The picture will help explain…
 Next add your remaining layers of small petals & more tulle in between. Once you get your last petal attached it’s time to glue down the bud. This may take a bit of finagling but just experiment. First you’ll want to stick it down like the picture below. Then if you pull it up you can tack down the base so the bud is upright. It’s hard to describe but just give it a try & you’ll see what I mean.
 Finally to attach the pin make two small snips in a felt circle so you can insert your safety pin. Glue to flower base.
 That’s it! I hope you like it!


THANK YOU!
This is exactly what I needed for my daughter's sweater dress!
Cute!! I love flowers.
I made it and it turned out PERFECT!!!! THANKS SO MUCH 🙂 🙂 🙂
This is so cute! I've been looking for a good tutorial because I dont' have a circuit to cut my fabric for me. Thank you soooo much!!
I love this, no sew, even better… Thanks for sharing!
I just found ur blog, I am def loving it, you have a beautiful little girl and have some very creative tutorials and ideas!
You are very talented!
Thanks,
Billie
This is such a great tutorial Natasha! Thanks so much for sharing the link with me! I am going to have to bookmark this and give them a try for sure!
Hope you have a souper week!
HUGS!
This is amazing! I think I am going to make one for my soon to be new niece and my sister to match 🙂 And maybe also one for me too!
wow it looks very nice. thanks for the photos of tutorial you show to us 🙂
Love love love this!